UFPayments Stripe workflow
In this tutorial we are going to setup a Stripe payment workflow, to start accepting payments with Stripe.
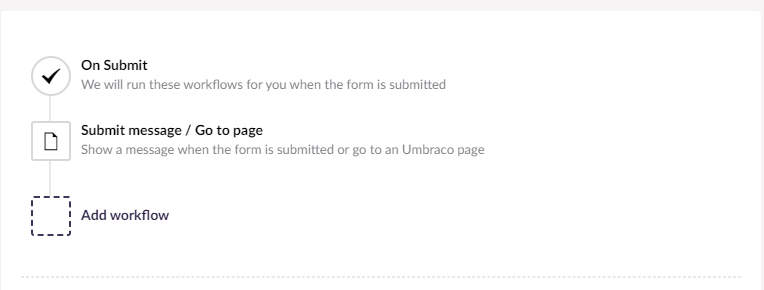
Add UFPayments Stripe workflow
- select "configure Workflow"

- Select "Add workflow"
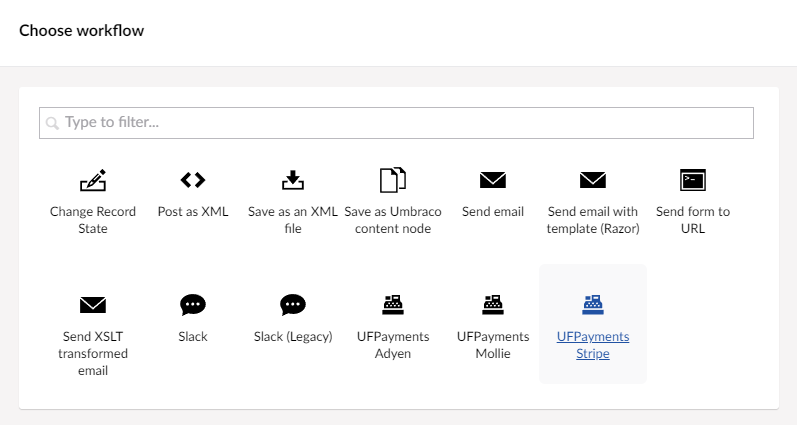
- Select "UFPayments Stripe"
Configure the workflow
Set the following fields and save the workflow.
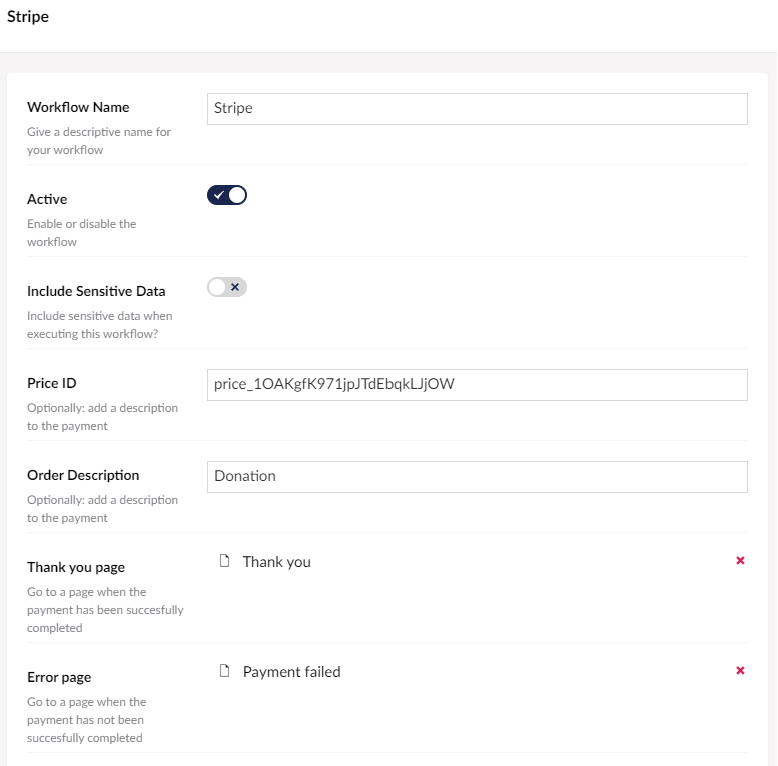
- Workflow Name: Fill in a name for the workflow e.g. "Mollie".
- Currency: Choose the currency code you wish to use for charging your customer.
- Price ID: Fill in a predefined price ID from Stripe.
- Order Description: Provide an order description that will appear in the customer's transaction log.
- Thank you page: Select a thank you page to redirect the user after a successful payment.
- Error page: Select a error page to redirect the user after a unsuccessful payment.
Additional configuration
If you already collect the users e-mail, you could use this field to pre-fill the customer email field in the Stripe checkout page.
Add a textfield for the e-mail address to your form and set the alias to "customerEmail".
